 Photo by Glenn Carstens-Peters
Originally Posted On: eClinicalWorks Tips & Tricks for 11e – Updated 2021 – AFYA IT Solutions
PROGRESS NOTE CARETSUsing Carets to Access Previous Encounter Information
Various sections of the Progress Note allow eclinicalworks users to utilize the caret function to carry forward information from previous encounters into the current Progress Note. The following sections of the Progress Note enable this functionality:
- Chief Complaint
- History of Present Illness (HPI)
- Review of System (ROS)
- Examination
- Physical Examination
- Assessment
- Procedures
- Preventive Medicine
- Next Appointment
- Visit Codes
- Procedure Codes
Carets enable providers and users to easily view, and carry forward previously documented information from the selected sections of the patient’s last two Progress Notes. Select the “More Details” button to view the last four Progress Notes.
The greatest benefit of the Carets are that you can quickly look up the patient’s past two-four Progress Notes, without switching screens.
Follow the steps below to Copy or Merge categories from previous encounters:
- From the Progress Note, click the caret icon next to your desired category. The Recent Encounters window will open:
- Click “More Details” to view information from the patients four past encounters.
- Select the box next to the encounters or categories to copy/merge.
- Click Copy or Merge to input information.
![]()
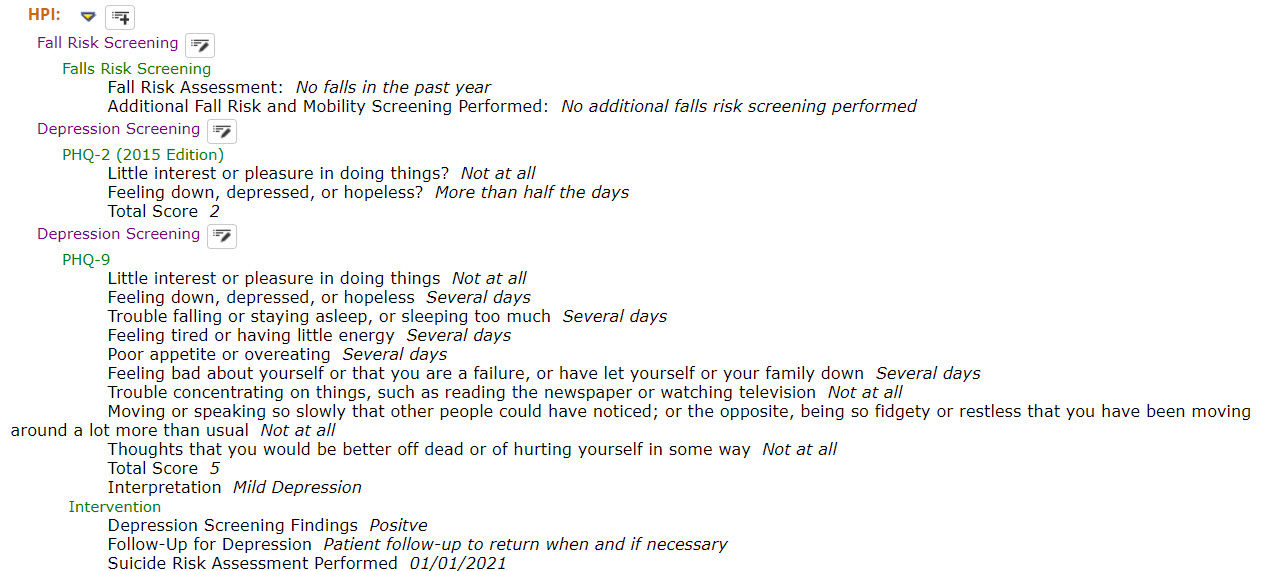
This setting, once enabled, will transform your progress noted from a “run-on paragraph” to better visual layout with Structured Data Elements on a New Line to better view the progress note. The setting technically changes the display style of the progress note to show Structured Data Elements on a New Line.
BEFORE – Default Setting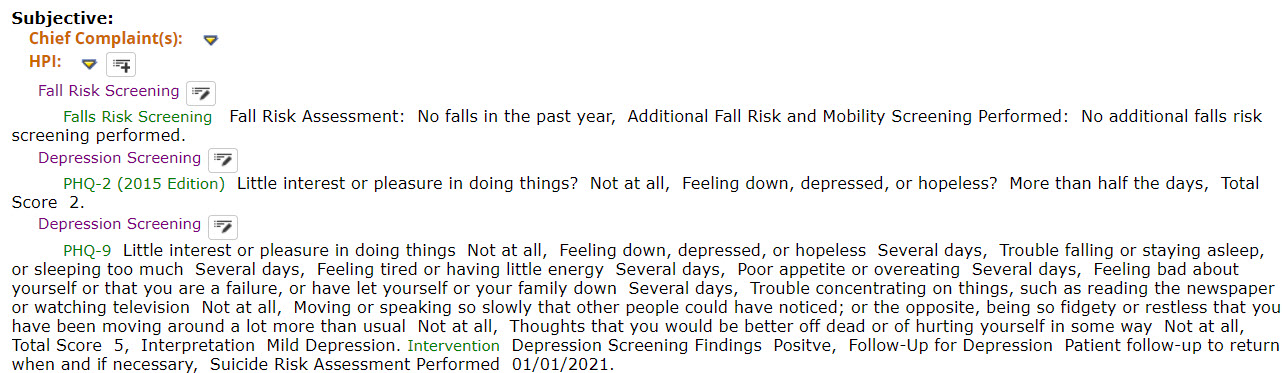
Follow the steps below to change the Progress Note format to display structured data elements on a New Line:
- Navigate to the Menu icon, select File, and then select My Settings. The My Settings window will appear.
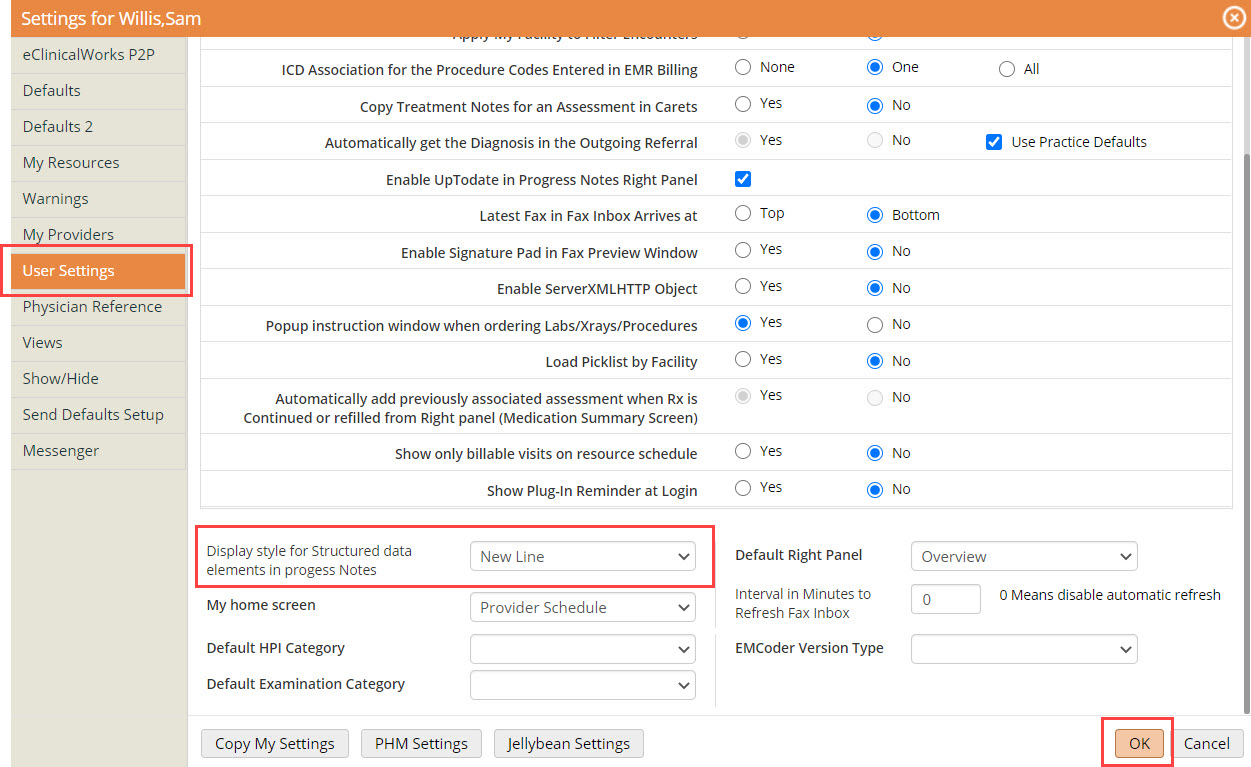
- Click the User Settings tab.
The User Settings options display. - Select the style from the Display style for Structured data elements in Progress Notes option dropdown list.
The three options are Default, New line, and Response in Bold.
This also affects the Virtual Visits tab of Telephone/Web Encounters.

Saving default templates can drastically reduce the time spent on clinical documentation. Templates are saved to streamline your workflows and reduce the amount of clicks needed to complete a patient encounter. They can be used in many ways to accomplish various goals and objectives.
Default Templates and Mini-Templates provide a great example of the importance of saving templates that providers can use to streamline clinical documentation.
Default templates are used to record an ideal patient visit for a specific visit type (Depression, AWV, Diabetes, ect). These templates are merged into a patients chart, merging in all the normal/default answers for each field used for a specific visit type. Once the defaults are merged into the chart, providers can change answer if there are any abnormalities.
Mini-Templates are used to address smaller sections or the progress note or specific treatments and follow up for a specific diagnosis. Mini-Template are great for capturing Quality Measures and for documenting follow up measures like Depression Screening& Follow-up, Smoking Screening, and Body Mass Index Screening & Follow-up.
In this use case, we’ll explore how to save templates from the progress note using the Templates bottom toolbar.
Follow the steps below to save a template form the Progress Notes window:
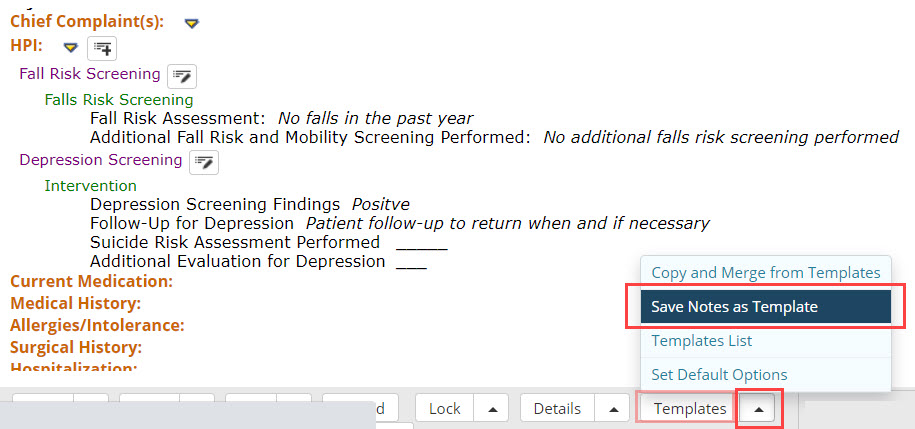
- While in the Progress Note, navigate to the Templates button on the bottom toolbar and click the (^) to the right.
- Then select “Save Notes as Template”. The “Save Notes as Template” window will appear.
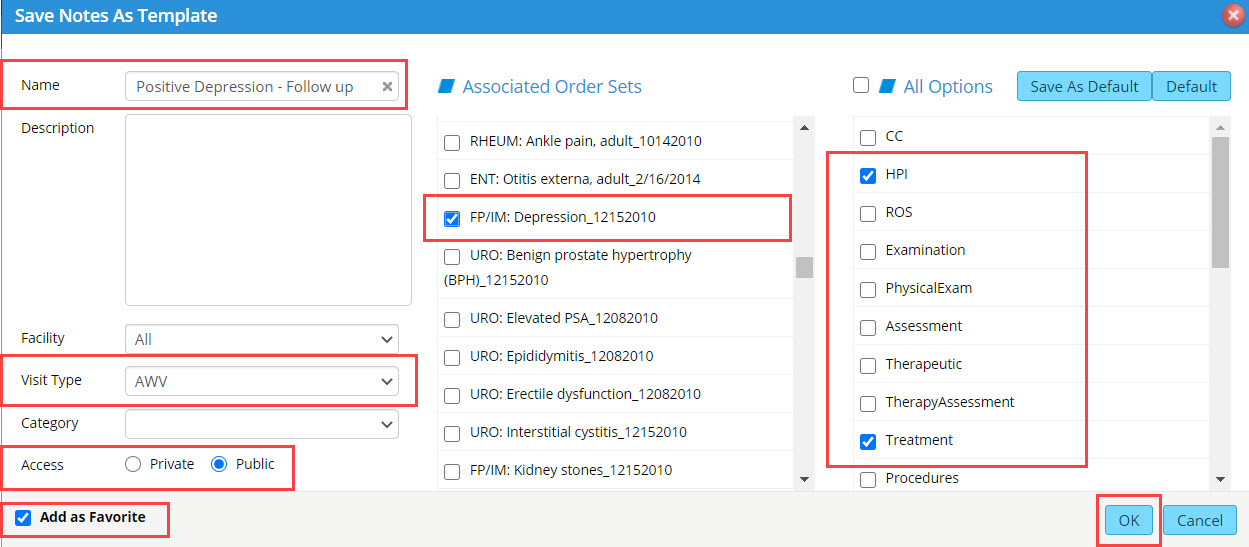
- Enter the appropriate details.
- Click OK to save the template.
Using templates can drastically reduce the time spent on clinical documentation while maximizing your patient visit by focusing only on information pertinent to that patient. These templates help guide you through documenting the Progress Note, allowing faster documentation with less errors and improved quality measure capture.
Here’s a few immediate benefits from using templates in your workflow.
- Only ONE click to merge multiple sections of the progress note into your current note.
- Ensure you’re documenting all required field for quality measure capture and reporting requirements.
- Streamline clinical documentation with disease specific templates
Follow the steps below to merge template from the ICW/Right Chart Panel:
- Navigate to the Right Chart Panel (ICW window) and click the Templates tab.
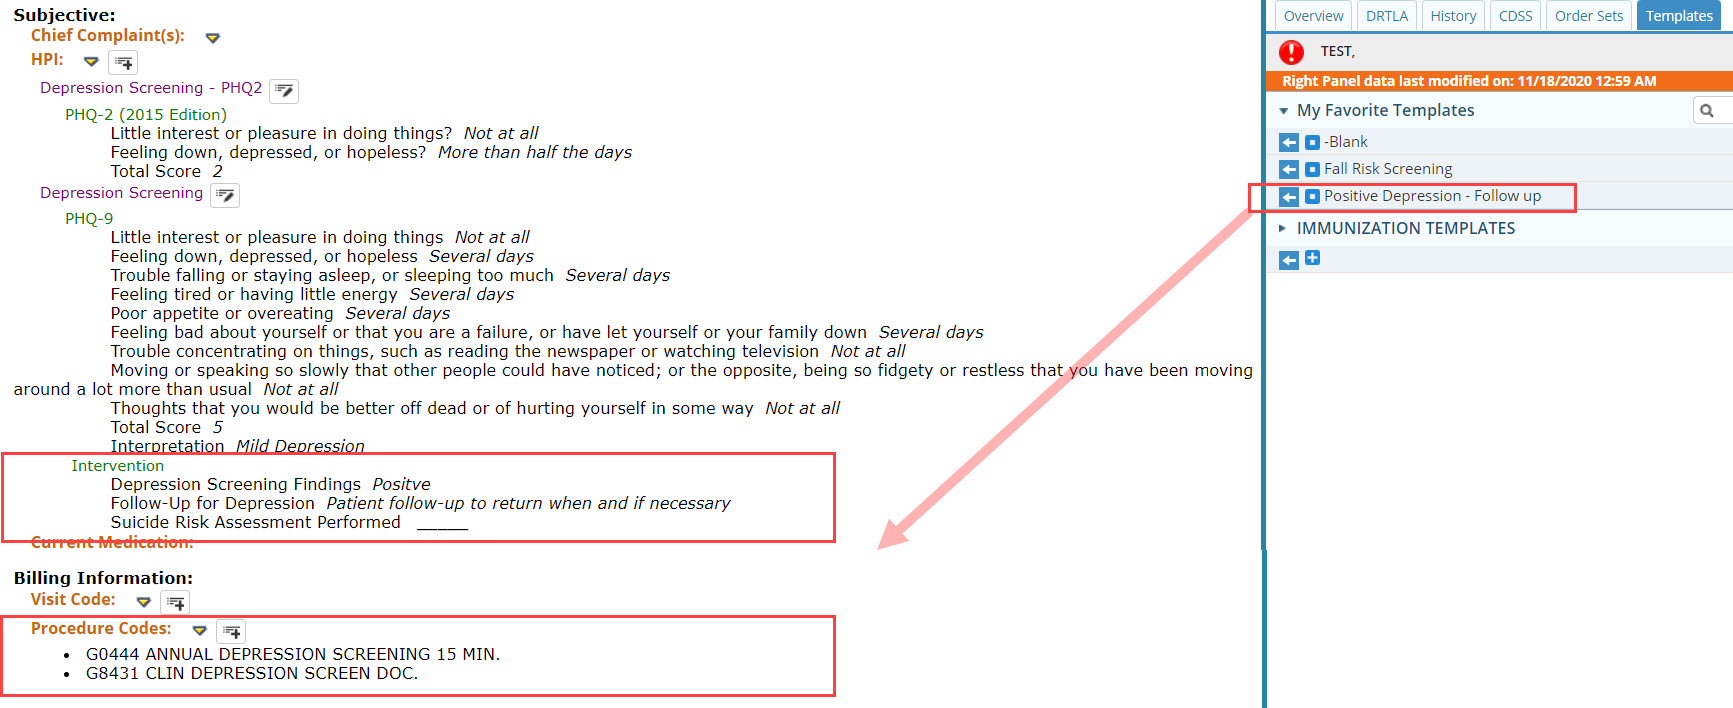
- Click the White Arrow (← ) next to the template you want to merge into the progress note.
If you don’t see the template you want, make sure the template is saved as a favorite in the templates window.
BEFORE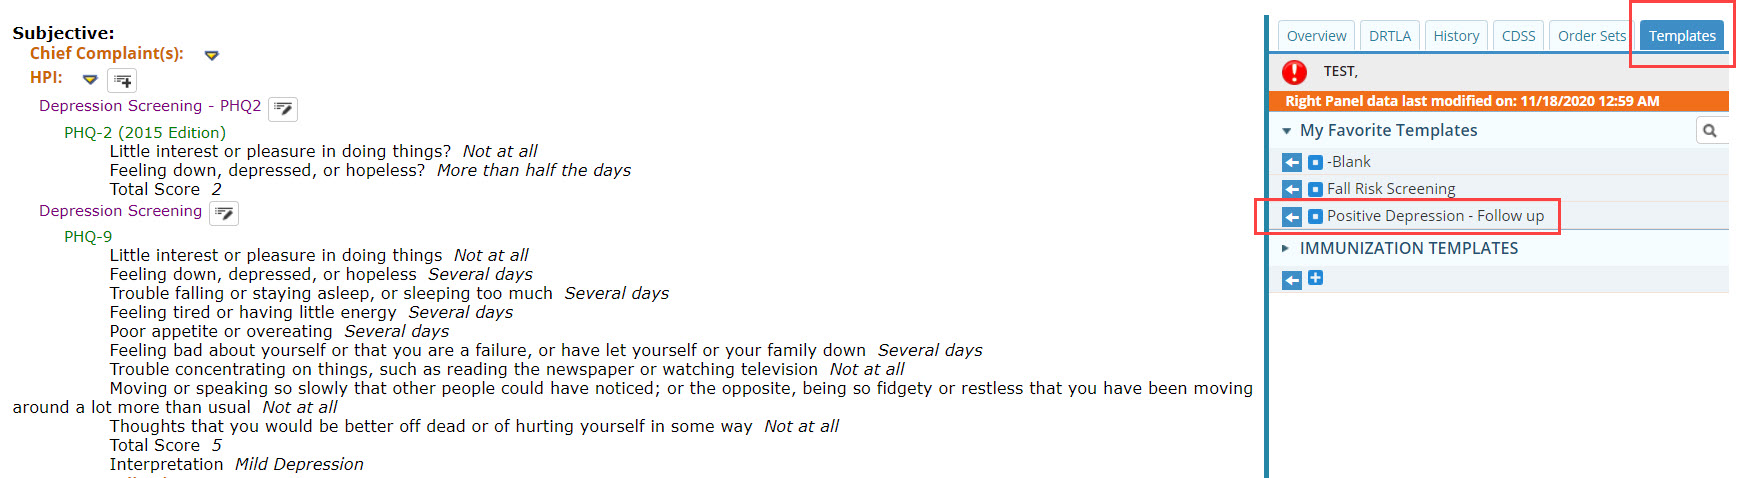
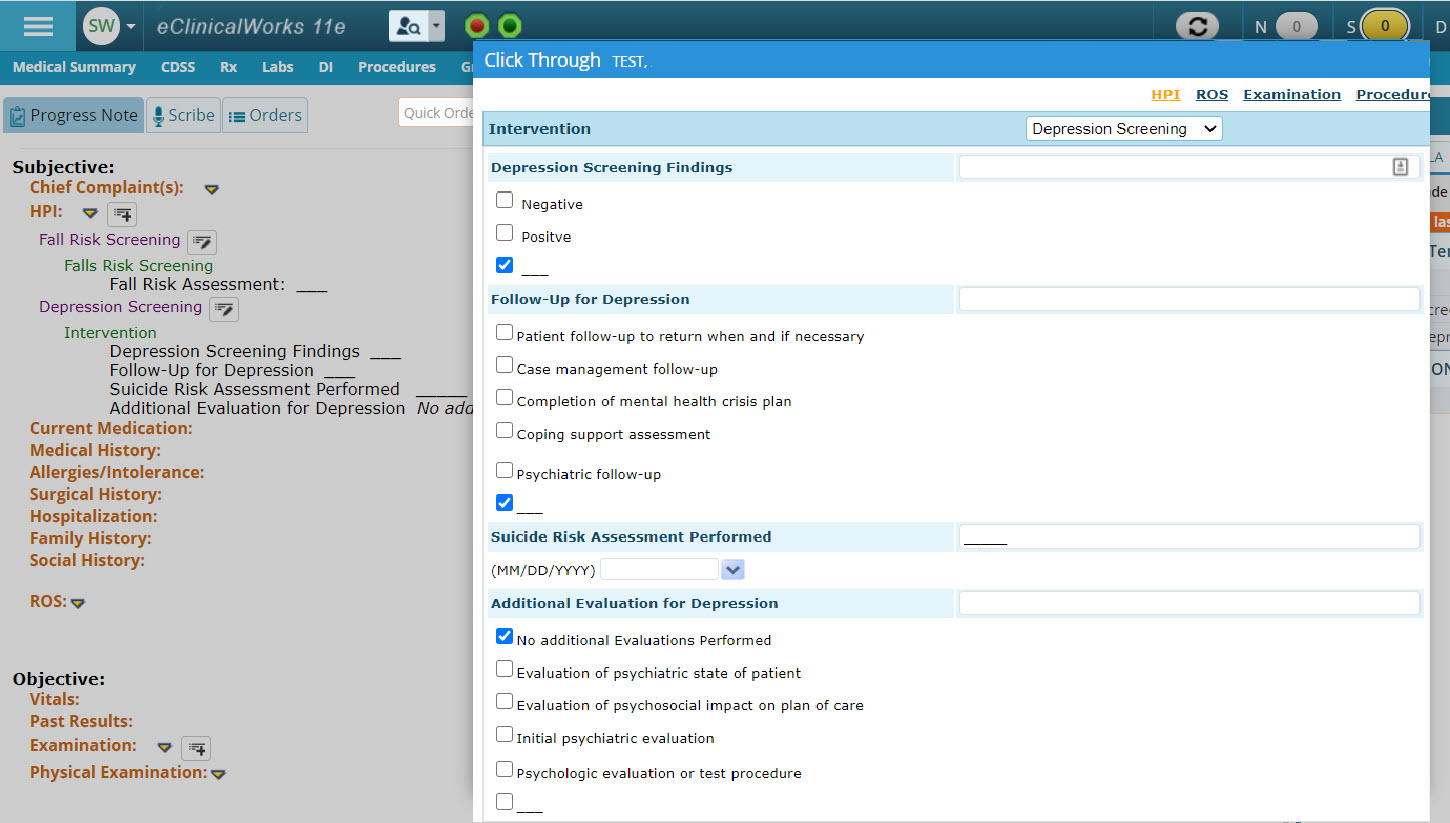
Using templates can drastically reduce the time spent on clinical documentation by eliminating having to open multiple windows while entering responses. With templates, the problem-related response options are just a click away.
- Brown – allow users to display that sections window.
- Purple – [The HPI Category] allows users to open a pop-up window on the HPI category associated with the selected hyperlink.
- Green [The Section Header/Title]- allows users to open a pop-up window on the HPI Property Items (Questions) category associated with the selected hyperlink.
- Black – [The Questions] allows users to open a pop-up window on the selected question.
- Italicized [The Answers] – allows users to open a pop-up window on the select answer.

By associating common templates with their appropriate visit type, providers can easily merge templates without manually merging templates or documenting using the progress note categories. Like mentioned above, templates can drastically reduce the time spent on clinical documentation and when practice configure this setting, it can save even more time!
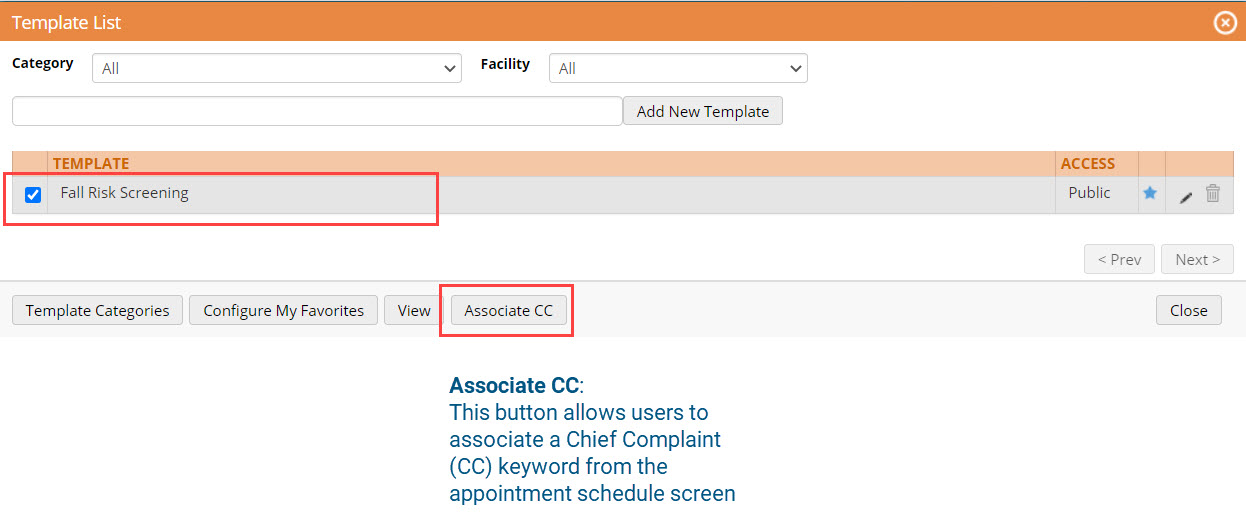
Follow the steps below to associate Chief Complaint keyword to a template:
- Navigate to the Menu icon, select File, and then select My Settings. The My Settings window will appear.
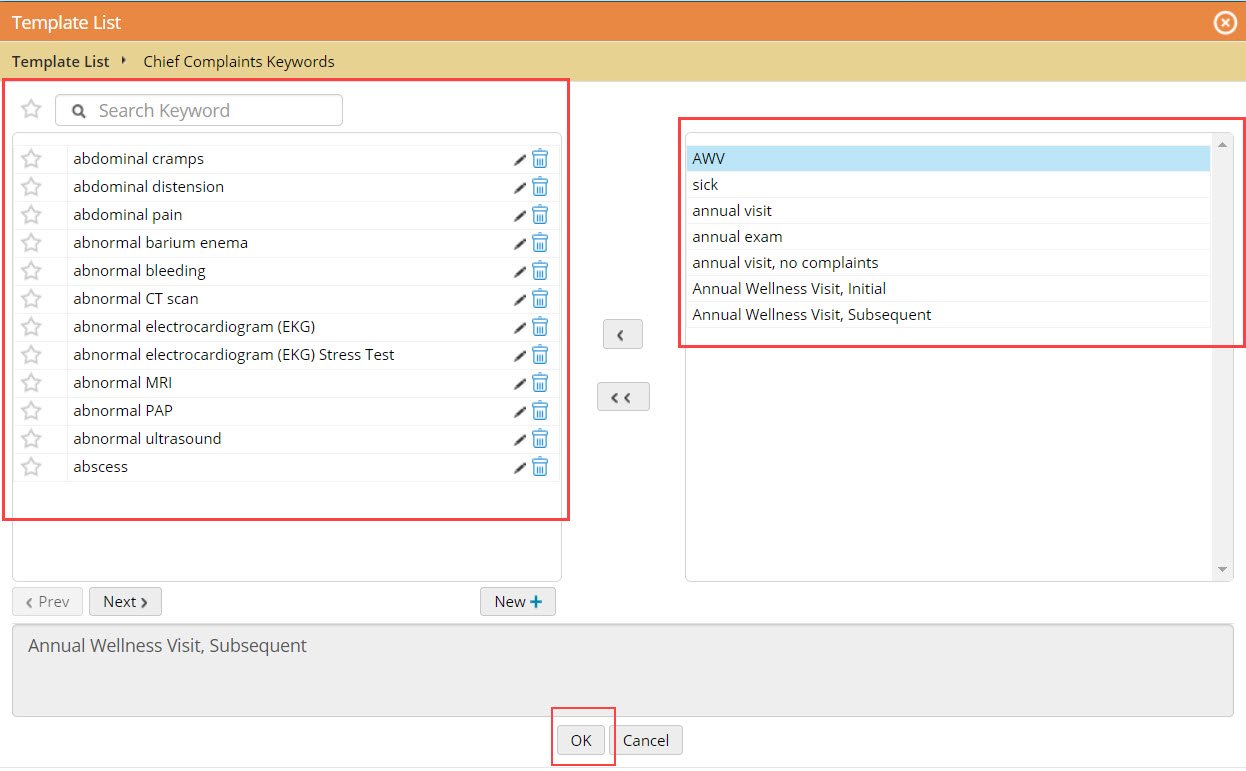
- Browse keywords from the directory or create one that fits your need.
- Selected keywords from the left pane will appear in the right pane.

Once you’ve associated your templates to their appropriate Chief Complaint keywords, you will have the ability to automatically merge the associated templates into the current progress note when the progress note is opened.
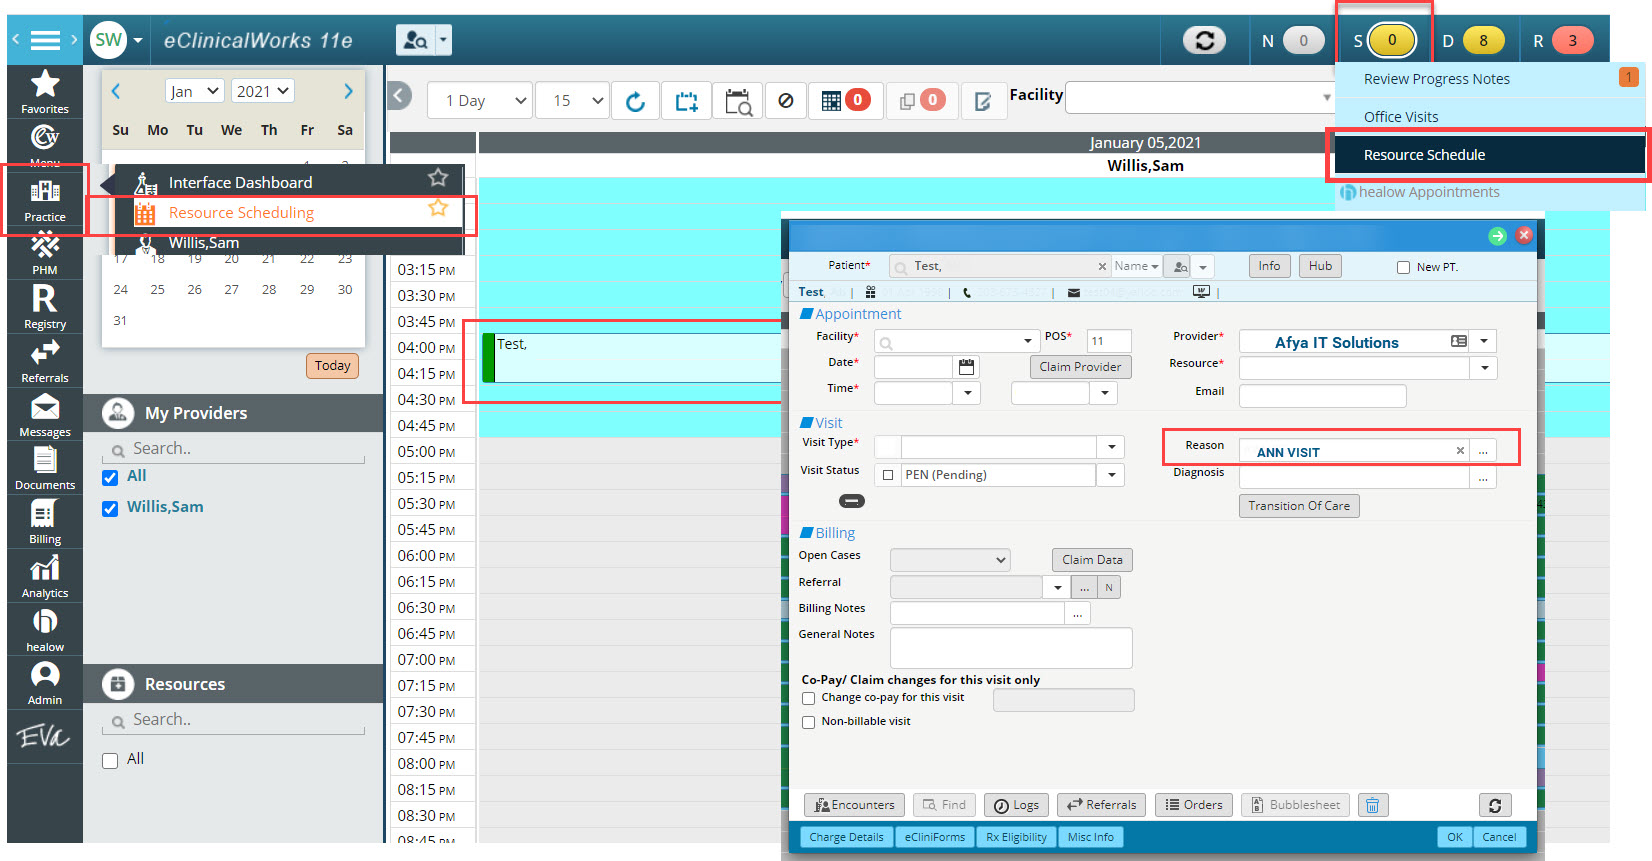
- Navigate to the Resource Schedule window (the appointment window) and double click a appointment slot. The Appointment Details window will appear.
- Complete the appointment details.
- Navigate to the “Reason” field and select the keyword that you previously associated with the necessary template.